When I searched for “dbeaver deeplink”, most results pointed me to CloudBeaver — a browser-based variant that requires running your own Docker container. That was not a viable option for me. It turns out standard DBeaver handles this just fine, and the connection is easy once you know what to do.
Enable public endpoint #
The database is not reachable from the outside by default. I had to go to the Laravel Cloud dashboard, navigate to my database and enable Public endpoint under connection settings. Without this step, no external tool will be able to reach the database at all.
The deeplink #
Once you copy the connection string from the Laravel Cloud dashboard, it looks like this:
mysql://bf34u6ft34:***********@db-a1825a28-b5ca-4f74-83f0-2d88dcd321f2.eu-central-1.public.db.laravel.cloud?name=Cloud%20-%20laravel_cloud_siteThe password looks obfuscated with asterisks in the UI, but the real password is present in the clipboard after copying.
The trick is to prepend jdbc: in front of the URL:
jdbc:mysql://bf34u6ft34:***********@db-a1825a28-b5ca-4f74-83f0-2d88dcd321f2.eu-central-1.public.db.laravel.cloud?name=Cloud%20-%20laravel_cloud_siteThen in DBeaver:
- Go to Database → New Connection
- Select MySQL
- Select the URL radio box
- Paste the
jdbc:URL there and the fields will populate automatically
If the MySQL driver is not yet installed, DBeaver will prompt you to download it — make sure not to dismiss that dialog, as it will not ask again.
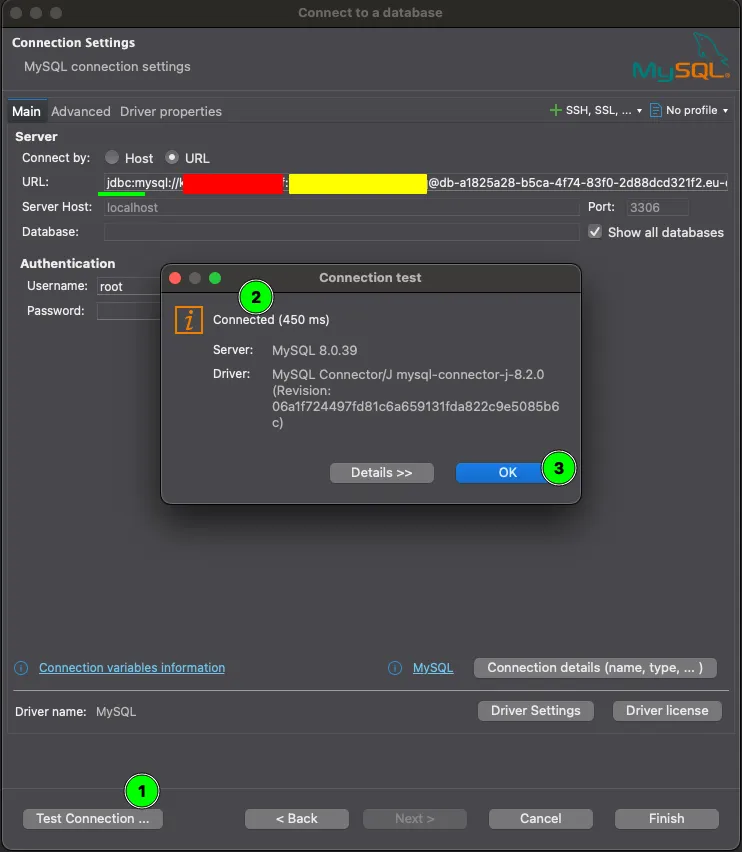
Enjoy!