My Motorola Moto Edge 30 Pro needed a case. The model number is XT2201 and every case available on Thingiverse or Printables is for XT2203 or XT2205, which are different phones entirely. They look very similar in thumbnails but the dimensions and button placements are just different enough to not fit.
I did not want to go buy a silicone case from a shop, since I have a 3D printer. Instead I did what I usually do - designed it myself. Well, sort of. I have used OpenSCAD before, but only for simple objects like the window holder. This time I let Claude write the OpenSCAD code while I focused on measuring the phone with calipers and describing what I needed.
The process went like this. I measured every relevant dimension on the phone: body size, camera bump position and protrusion, button positions and lengths, every hole on every edge. Then I fed the measurements in, one by one, and the AI produced parametric code. When something looked wrong in the preview, I pointed it out and it got corrected. The camera cutout ended up on the wrong side at first. Some holes were extruding outward instead of through the wall. An edge radius caused the geometry to collapse to literally a dot because of a math issue in the rounding function. All of this got sorted through back and forth conversation.
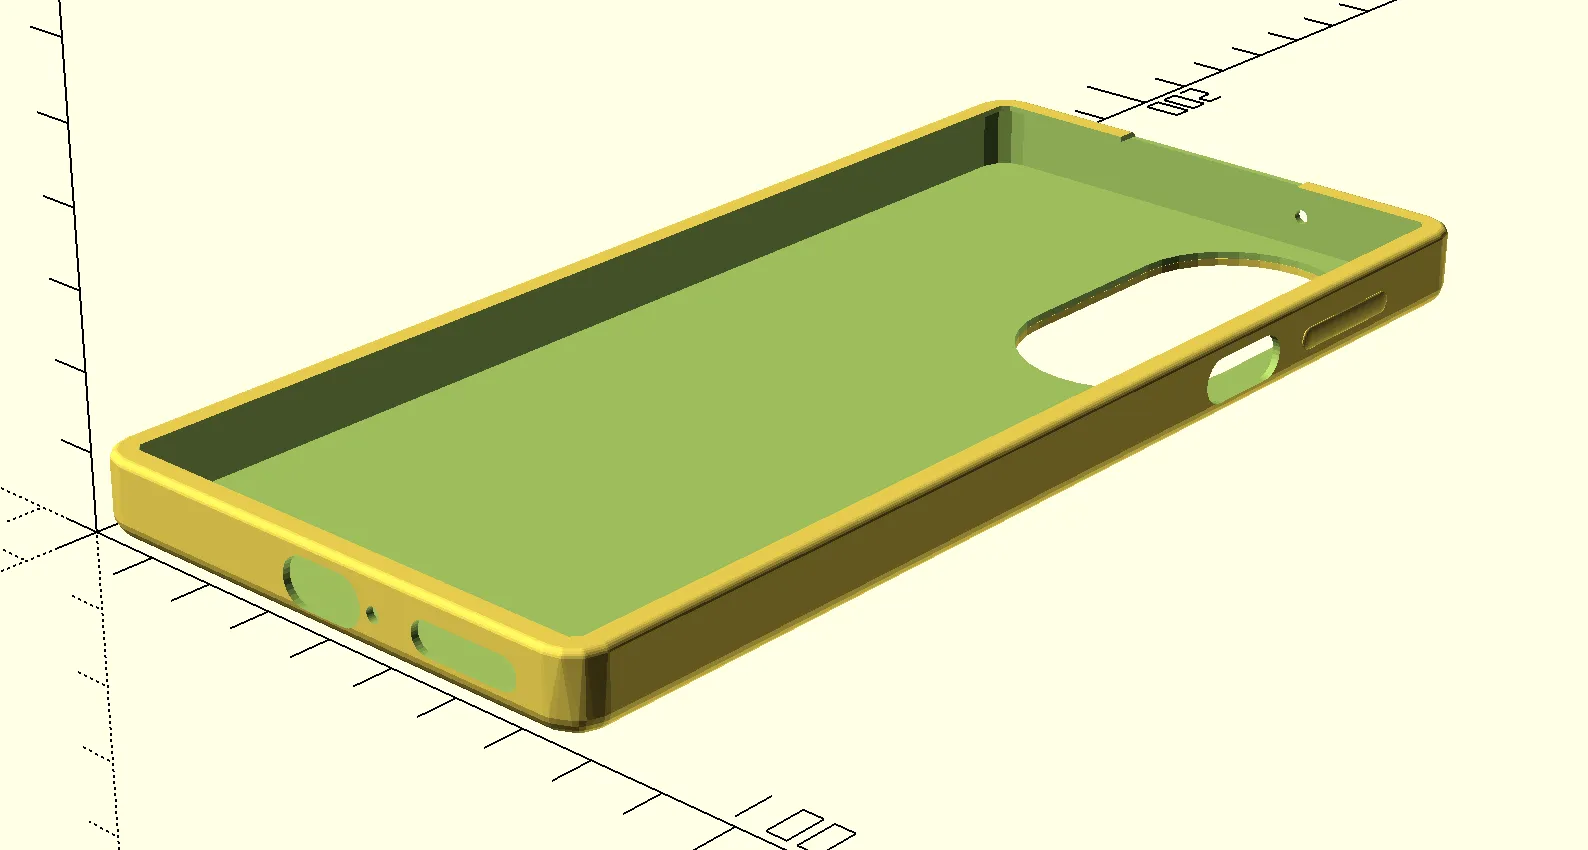
The whole model is parametric, meaning every single dimension is a named variable at the top of the file. If my caliper was off somewhere, I can adjust just that one number and the entire case recalculates. The case has cutouts for USB-C, speaker grille, two microphone holes, a power button hole that leaves the fingerprint reader accessible, and a tactile ridge over the volume rocker so I can find it by touch without looking. The camera bump area gets a raised ring around it so the phone does not wobble on a desk. The front lip wraps the display bezel on three sides and leaves the earpiece and the distance sensor open at the top.
What I find interesting about this is that the feedback loop is very different from vibe coding software. With software, you run it and see the result immediately. With a physical object, you stare at a 3D preview and try to imagine if it is right. The real test comes only when it comes out of the printer. TPU is the obvious material choice here, same as the sanding pad I printed recently.
It still needs to be printed and test fitted on the actual phone. But the model looks right and the approach worked well enough that I would do it again for another device.
Enjoy!